Anisotropic: metal, compact discs (cd's) or hair
Blinn: metal surfaces but I end up using blinn for almost every object type (basically blinn can be modified to be used for almost anything at all.)
Hair Tube Shader: The shader attributes are similar to the anisotropic shader in terms of the the specularity control... besides that it's the basic Blinn shader attributes, with a few extras.
*Maya Help files say:
If you convert your Paint Effects hair system to polygons, then a default Paint Effects tube shader is created. The former color attributes you set in the hair system are converted to the tube shader, but there is no construction history for these attributes. Any shading changes you want to make after you convert Paint Effects to polygons must be done using the tube shader.
Lambert: nothing. lol well not nothing, i guess you can use it for chalk, or really dull objects... I recomend just using the Blinn shader then turn down all the specularity and reflections, to get the same effect, just with more control.
Layered Shader: allows you to use different shader types, and stack them into layers much similar to how you would with photoshop layers
Ocean Shader: water, oceans. It's attributes control things like wave size, strength, speed, etc... it's pretty straight forward for the most part.
Phong: Plastic, or tiles, or anything that has a high gloss look to it.
Phong E: same as Phong except with different specularity controls. not really any difference...just personal preference.
Ramp Shader: allows you to create cartoon type shaders, or subtle rim-light effects, etc... I usually just use it for cartoon characters if you want it to look like 2d animation/renders. But it can also be used to control the colours falloff, etc without having to deal with the sampler info node etc.
Shading Map: is used for custom shaders. I used to use it for custom cartoon shader before the ramp shader came standard with maya. You can also connect other shaders to this node such as lambert, blinn, etc...
Surface Shader: is used for custom shaders as well, along with some render passes tricks, etc.
*edit* this is what the maya help files say:
Is a material (shader) that is a wrapper node, which means that you can connect any keyable attribute to this shading group, and then connect the shading group to an object. For example, you can connect an object's Translate Position to a Surface Shader's Out Color attribute to determine the object's color by the object's position.
Use Background: I have no idea, I never used this shader in my Life. I think it has something to do with compositing photo/film footage within the 3d scene. The object won't show up in a render, but it will take on shadows, and reflections, etc..
I'll have to research this shader more ... F1/help is my best friend, so is google :P
Wednesday, April 7, 2010
---------------------Common Material Attributes----------------------
Color - sets the color of the shader. This can be textured, or combination of Utility Nodes can be applied to give different effects to the color shader.
Transparency - Black=0 White=1; you can choose just a color value between 0-1 or create a more complex texture to give your object a unique transparent pattern/shape.
Ambient Color - (maya says) is black by default, which means it does not affect the material's over-all color. As the ambient color becomes brighter, it affects the material's color by lightening it and blending the two colors.
If there are ambient lights in the scene, then the color and brightness of those lights are used to control how much the ambient color contributes to the final color of the material.
Incandescence - basically makes the shader appear to have it's own light source. But do not mistake it as a light source. (unless using Mental Ray) By default it's black, so no self illumination, but if you give it a value, it will only affect itself, no other shaders or materials.
Bump Mapping - Simulates a 3-dimensional surface detail. Creating the "illusion" of bumps, and scratches, etc. *NOTE: this does not physically affect the shape of the object. if you are looking to do that, Check out "displacement mapping"
Diffuse - Controls how much light in the scene is "scattered" off the object. So how much light is absorbed by the object, and then the rest is scattered off. Black is all absorbed (making the object darker) and White is all scattered light (making the object lighter) This can be mapped like any other channel. Usually you use it in conjunction with Color, Spec, and Bump.
(maya says
Translucence - Simulates the way light diffusely penetrates through translucent objects. This means that when light shines on one side of the object, the other side is partially illuminated. This can be used for effects such as clouds, fur, hair, marble, jade, wax, paper, leaves, etc.
If Translucence is set to 0 (the default) then no light shows through the object. If it is set to 1, all the light shows through.
Translucence Focus- Simulates the way light scatters more in a forward direction through translucent objects. Thin objects like a leaf, or low density objects like a cloud tend to scatter more in a forward direction.
When the Translucence Focus is 0.0, translucent light is scattered in all directions. As the focus value is raised the translucent light is scatter more in the light direction. This makes the backlit side of a leaf glow more than the front lit side. At high focus values you will see a halo or glow around the light source when seen through a translucent object.
Translucence Depth- Defines the depth of penetration into an object at which translucence decays to nothing.
When Translucence Depth is 0, translucence does not decay with respect to the distance light travels through the object.
----------------------------Specular Shading --------------------------
Eccentricity - changes the size of the shiny highlights.
Specular Roll Off - changes the blend between the highlights and the non highlighted parts of the surface.
Specular Color - the color of the highlights of an object. *NOTE: for plastic shiny surfaces, use a white-ish color. For Metal use the same color as your color channel, but crank the value up over 1
Reflectivity - (maya says) Gives the surface the ability to reflect its surroundings or the Reflected Color (similar to Specular Roll Off). The valid range is 0 to infinity. The slider range is 0 (no reflections) to 1 (clear reflections). The default value is 0.5.
Reflectivity values for common surface materials are car paint (0.4), glass (0.7), mirror (1), chrome (1).
Reflected Color - is the color of light reflected from the material. When raytracing, this color will mix (multiplies) with the color of your light, allowing you to "tint" the reflection.
*NOTE:
If you are not raytracing, you can map an image, texture, or environment map to the Reflected Color attribute to create fake reflections, which is faster and uses less memory than raytracing.
--------------------------------Special Effects -----------------------
Hide Source - if this is checked on, you will not see your geometry, just the the glow in the shape of your object. If it's off, you will see both your object and your glow.
Glow Intensity - is a multiplier to the GLOW SHADER (check out glow shader for more glow attributes)
*NOTE: do not get this confused with the incandescence attribute. Glow is addes as a post-process, Meaning that it is applied after the render is done. Incandescence is applied during the main rendering and does not actually make your surface glow, but rather make it appear "brighter"
The Glow will add a halo around your surface. Something Incandescence cannot do.
*NOTE: if you use the glow shader, take off the "auto exposure" in the glow shader attributes, if you do not, you will get flickering in your animation. and make your glow look inconsistant.
----------------------------------Matte Opacity -----------------------
This is mostly used for compositing. I do not have a lot of knowledge on this subject but, Basically it controls your alpha masks for that object. allowing you to change/animate the channels for compositing needs.
BLACK HOLE: maya sets the channels mask value to zero. if the object has transparency's in it. any objects behind it will not appear in the mask channel (alpha channel)
OPACITY GAIN: Sets the channels mask, then Multiplies the mask values for the object by the matte opacity values. so if the matte opacity is 1. it stays unchanged. If it's 0.5 the mask values for the object are half their original settings.
SOLID MATTE: sets the mask to a constant value. If object is transparent, any objects behind it will appear in the mask channel (alpha channel)
------------------------------Raytrace Options --------------------------
Refractions: turned off by default. if turned on, it will make your shader refract light when rendering in ray tracing. You will not see a difference if the REFRACTIVE INDEX is set to 1.
Refractive Index : Default is 1 (nothing changes)
It defines how much a ray of light bends when it passes through your object. This will only work if you have a partially or completely transparent object.
Index Presets:
Air: 1.0
Water: 1.33
Gasoline: 1.45
Crystal: 2.00
Glass: 1.5
Ice: 1.309
Quartz: 1.6
Ruby: 1.77
Sapphire: 1.77
Salt: 1.54
Alcohol: 1.329
Emerald: 1.57
Polystyrene: 1.55
Refraction Limit: Maya files say Ray Depth Limit. which i think means how many times a ray of light can pass through a surface. just remember the higher the number is, the slower the render.
*NOTE: To simulate realistic looking glass, set the Refraction Limit value to 9 or 10.
Light Absorbance: How light-absorbing the material is. so if the value is zero, it allows light to go through completely. and the higher the value, the less light passes through.
*NOTE: the thicker a material, the less light gets through. the thinner it is, the more the light will go through.
Surface Thickness: simulates the thickness of a transparent object used for things enclosed surfaces, for example; like a window or windshield. it won't work as well as an actual modelled window pane.
Shadow Attenuation: Simulates caustics. for example liquid or glass shadows have a brighter center. simulating "focused light".
Values go from zero to one. 0-1. 0.5 is default. to turn it off use zero. the closer to 1 the more intense the shadow's bright center gets intense.
Chromatic Aberration: (maya says) Different wavelengths of light refract at different angles when passing through a transparent surface during raytracing. Chromatic Aberration only affects light rays as they pass through the second surface of a transparent object (the first exit ray).
So, it doesn't affect the light unless it's leaving an object... going in only, it does nothing.
-------------------------------Vector Renderer Control -------------------
*need to activate the vector renderer in WINDOW>SETTINGS/PREFERENCES>PLUG-IN MANAGER
once activated go to render globals and choose it like you would for Mental Ray.
All the attributes are really quite forward. You can do default settings, in the render settings window.
or customize them per object by selecting the "Overwrite Default Values" in the shaders "Vector Renderer Control"
---------------------------------Mental Ray ----------------------------
Reflection/Refraction Blur: (maya says)Determines the blurriness of the reflection or refraction by calculating the angle (in degrees) between the perfect reflection or refraction direction and the jittered ray direction. A value of 0 creates a perfectly specular interaction; a value of 90 a perfectly diffuse reflection or refraction. Values of 10 to 30 are good starting points.
Reflection/Refraction Rays: Defines how many rays to use to sample the random deviation from the perfect specular direction.
*NOTE: In general, more rays are required for more blurry reflections or refractions. Other sampling parameters also affect this setting: per-object samples and the Render Settings sample setting supersample in image space. If you increase any of these two settings, you may be able to reduce the number of rays without loss of quality, while significantly improving performance.
Irradiance: the ability to bounce indirect photons. (maya help files suggests using this with baking illumination and color.
*I don't know a lot on this subject so I can't add to this section. yet.
Irradiance Color: the color of the bounced photons.
This next one isn't on the blinn shader but it can be useful if you run across it when rendering with mental ray:
Occlusion Mask:Lets you see the soft shadow, produced by final gathering, of an object on a surface that uses the Use Background shader. These soft shadows are also captured in the alpha channel of the image for compositing purposes.
You can set values for Occlusion Mask between 0 (no shadows) to 1 (full shadows), or map the attribute.
Photon Attributes: Set attributes to Derive From Maya, or turn the option off and set remaining attributes, such as Specular Color and Diffuse, so that they are calculated using mental ray. Alternatively, you can change the settings in the Maya sections of the Attribute Editor (Common Material Attributes, and so on) and click Take Settings From Maya to compute the equivalent mental ray values for these attributes.
------------------------------------Node Behavior ----------------------
Caching: turn caching on to temporarily store the nodes input evaluations in a cache file. Whenever maya needs this information it is quickly accessed from this cache file, instead of having to re-calculate the nodes input.
*NOTE: the cache file is destroyed when you change an attribute. Also, Caching uses more memory, which could affect maya's performance.
(maya says)
Node State:
Normal- Causes the node to behave normally, according to the defined settings and effects. This is the default.
HasNoEffect - Disables any effects on the node so that fewer calculations are necessary at the time of redraw. The effect does not render until you reset the Node State back to Normal. Maya evaluates the nodes in the node's history, but not the node itself.
For example, if you translate a cluster to deform a geometry, then set the Node State of the cluster node to HasNoEffect, the geometry appears undeformed, as though the translation had not occurred. To view the effect, change the Node State back to Normal.
Blocking - Temporarily hides the node and does not display the results of any input (input evaluations) to the node. This can speed the redraw. It is also useful when you have complex scenes and want to edit only one aspect of a node. Blocked nodes do not render.
For example, if you have a complex revolved surface and want to edit the curve, but don't want to wait while the curve redraws, select Blocking and edit the curve. To display the modified revolved surface, reset the Node State to Normal.
*NOTE:
* The "HasNoEffect" state has a different meaning for each node type. Some node types do not implement the state, in which case the state acts just like "Normal".
* The "Waiting" node states are used internally by Maya to keep track of nodes that are waiting for a view update in the Hypergraph. You should not normally set nodes to a "Waiting" state.
---------------------------------Hardware Shading --------------------
no idea
it doesn't show up in renders...
Possibly affect hardware renders? *not sure*
------------------------------Hardware Texturing-----------------------
allows you to preview your textures and channels right in your viewport only, it doesn't change how the objects render.
Glows and Bumps will not show up in this you'll need to render the scene to see those effects.
------------------------------------Extra Attributes --------------------
any custom attributes you've added through ATTRIBUTES>ADD ATTRIBUTES
Monday, March 8, 2010
ambient occlusion
http://www.game-artist.net/forums/spotlight-articles/1317-tutorial-ambient-occlusion-maya-alchemist101.html
Saturday, March 6, 2010
set driven key
http://caad.arch.ethz.ch/info/maya/manual/UserGuide/Animation/KeyframeMoPath/03_understanding_key.doc5.html
Thursday, February 4, 2010
update
Just changed the template of my blog so that I can post bigger images. I had to resize them to smaller than 400px in width before...no more of that.
I'll post up pictures of my character design and layouts soon.
I'll post up pictures of my character design and layouts soon.
Tuesday, January 26, 2010
on lighting
http://www.itchy-animation.co.uk/tutorials/light.htm
http://www.3dtotal.com/team/Tutorials_3/basic_maya_lighting/basic_maya02.php
http://warpedspace.org/lightingT/part1.htm
http://www.creativecrash.com/maya/tutorials/rendering-lighting/c/faking-global-illumination
http://www.3dtotal.com/team/Tutorials_3/basic_maya_lighting/basic_maya02.php
http://warpedspace.org/lightingT/part1.htm
http://www.creativecrash.com/maya/tutorials/rendering-lighting/c/faking-global-illumination
Sunday, January 17, 2010
Saturday, January 16, 2010
Photoshop Blending Modes
Layer Blending Modes in Photoshop and Elements
Blending modes
Photoshop and Elements allow for layer blend modes that change the way layers react with each other. Some of them you will use in every day work. If you have a photo that is too dark, for example, many times a quick fix is to duplicate the photo layer in the layers palette and change the duplicate layer mode to Screen. If a photo is too light it can sometimes be corrected by duplicating the photo layer and changing the layer mode to Multiply.
How do you know what layer blend mode to choose? Let's look at them and how they work, and take some of the mystery away! (Some. Not all.)
Color
To understand blend modes, you need to know a little about color. Color is light, and likewise, light is made up of many colors. Objects absorb or reflect these light waves. Our eyes perceive these wavelengths as color. Let's start with the color wheel.

The COLOR WHEEL has 12 segments that consist of primary, secondary and tertiary hues, or colors.
The three PRIMARY colors are RED, YELLOW, and BLUE. They form a triangle on the wheel. These colors cannot be mixed by combining any other colors. They are indicated on the color wheel with a P.
The three SECONDARY colors of ORANGE, VIOLET, and GREEN (marked on the chart by an S) are created by mixing equal parts of the primary colors they fall in between; ie, VIOLET is the secondary color produced by mixing equal parts of RED and BLUE.
The TERIARY colors are the colors that result from mixing the primary and secondary colors on either side of them: ie, mixing the secondary color ORANGE with the primary color RED results in red-orange. These colors are marked on the color wheel with a T.
Using the color wheel you can determine color schemes fpr balance and harmony in your artwork, webpages, desktop publishing designs or home decorating.
Hue: Hue refers to the color...red, blue, etc.
The primary, secondary, and tertiary colors, or hues, are these colors at their full saturation or brightness; that is, there, there is no white, gray, or black added.
Value: the lightness or darkness of a color, or the relative amount (percentage) of white or black in a hue.
Luminosity, or Lightness: A measure of the amount of light reflected from a hue. Those hues with a high content of white have a higher luminance, or value.
Tints: white when added in increments to any color results in a lighter value of that color, called a tint. Blue and white make light blue, which is a tint of Blue.
Shades: black or gray when added in increments to any color results in a darker value of that color, called a shade. Blue and Black make dark blue, a shade of blue.
Saturation: The degree of purity of a hue.
Intensity: The brightness or dullness of a hue. Iintensity maybe lowered by adding white or black.
The blending modes
In Photoshop and Elements the layer blend modes can be changed in the layers palette. In these programs, changing the layer blend mode affects the entire layer, even if you have a selection. In Illustrator the blend modes work basically the same, but a different blend mode may be applied to different objects on the same layer, so the blend mode popup is found in the transparency palette.

The dropdown menu on the left contains the blend modes which we'll discuss fully in a minute.
Normal is the default, and the objects interact with each other as if they were both solid color objects, at 100% opacity. When one is over the other, what is covered you can't see.
The rest of the modes interact with each other in different ways.
To use layer blend modes you have to have two or more layers. The blend mode will react with the layer below it. If you have only a background, the blend mode popup will be grayed out, as these modes cannot be applied to backgrounds.
For these demos I will be using an image with two layers. The blending mode will be applied to layer 1 and we'll look at the way they interact.
The background | layer 1 |
 |  |
Normal mode
| Normal mode is the default. The colors of the two layers will not interact in any way, and it will display the full value of the colors in layer 1. What you see in the image window will look like this. |
Dissolve
 | Dissolve makes the lower layer take on the colors of the top layer, and how much depends on the opacity of the upper layer. The layer 1 opacity is set at 50% here. Disolve only affects pixels with some transparency, which is why I lowered the opacity to 50% in this example. |
Darken
 | Darken compares each pixel value of the upper layer to its counterpart's pixel value of the lower layer and chooses the darker of the two to display. |
Multiply
 | Multiply darkens the lower layer based on the darkenss of the upper layer. No part of the image will get lighter. Any applied tone darker than white darkens the lower layer. White becomes transparent.
|

Color Burn
 | Color Burn burns in the color of the upper layer with the lower layer. No part of the image will get lighter. |
Linear Burn
 | Linear Burn works like multiply but the results are more intense. |
Lighten
 | Lighten compares the two layers pixel for pixel and uses the lightest pixel value. No part of the image gets darker. |
Screen
 | Screen brightens by lightning the lower layer based on the lightness of the upper layer. The result is always lighter, and makes it a good mode for correcting exposure in photos that are too dark. |
Color Dodge
 | Color Dodge dodges the lower layer with the upper layer, resulting in a lighter image. No part of the image will be darkened. |
Linear Dodge
 | Linear Dodge works like screen but with more intense results. |
Overlay
 | Overlay multiplies the light colors and screens the dark colors. |
Soft Light
 | Soft Light will multiply the dark tones and screen the light tones. |
Hard Light
 | Hard Light muliplies the dark colors and screens the light colors. |
Vivid Light
 | Vivid Light will dodges or burn the lower layer pixels depending on whether the upper layer pixels are brighter or darker than neutral gray. It works on the contrast of the lower layer. |
Linear Light
 | Linear Light is the same as Vivid light but it works on the brightness of the lower layer. |
Pin Light
 | Pin Light changes the lower layer pixels depending on how bright the pixels are in the upper layer. It acts like Multiply when the upper layer color is darker than neutral gray, and acts like screen if the upper layer color is lighter than neutral gray.
|
Difference
 | Difference reacts to the differences between the upper and lower layer pixels. Large differences lighten the color, and small differences darken the color. |
Exclusion
 | Exclusion uses the darkness of the lower layer to mask the difference between upper and lower layers. |
Hue
 | Hue changes the hue of the lower layer to the hue of the upper layer but leaves brightness and saturation alone. |
Saturation
 | Saturation changes the saturation of the lower layer to the hue of the upper layer but leaves brightness and hue alone. |
Color
 | Color changes the hue and saturation of the lower layer to the hue and saturation of the upper layer but leaves luminosity alone. |
Luminosity
 | Luminosity changes the luminosity of the lower layer to the liminodity of the upper layer while leaving hue and saturation the same. |
(http://www.northlite.net/ps/blend.htm)
Tuesday, January 12, 2010
Cactus - Bumblefoot
If you sit in a pot of dirt with nothin' to say - you're a cactus
If you spend all day starin' at the sun - you're a cactus
If you don't wanna get close so you wear a coat of pins - you're a cactus
If you keep your world barren like a desert - you're a cactus
If you have no face and need more space - you're a cactus
If you like to hide in the sand - you're a cactus
If you can't seem to get anything done - you're a cactus
And if the company of tumbleweed is unexpected fun - you're a CACTUS!
If you fit in perfectly in an empty room - you're a cactus
If you hurt anyone who bumps into you - you're a cactus
If your social circle is you - you're a cactus
If you're referred to as 'what' instead of 'who' - you're a cactus
If your skin is green and you have no spleen - you're a cactus
If simple creatures think of you as mean - you're a cactus
If life-sucking weeds won't even go near ya - you're a cactus
And if balloons fear ya - you're a CACTUS!
If the world finds you abrasive - you're a cactus
If you're unique with a plain physique - you're a cactus
If you're full of wine and have no spine - you're a cactus
If you resemble a sleeping porcupine - you're a cactus
If no one wants to sit on your lap - you're a cactus
If you are full of, or considered a sap - you're a cactus...
Wednesday, January 6, 2010


Saturday, January 2, 2010
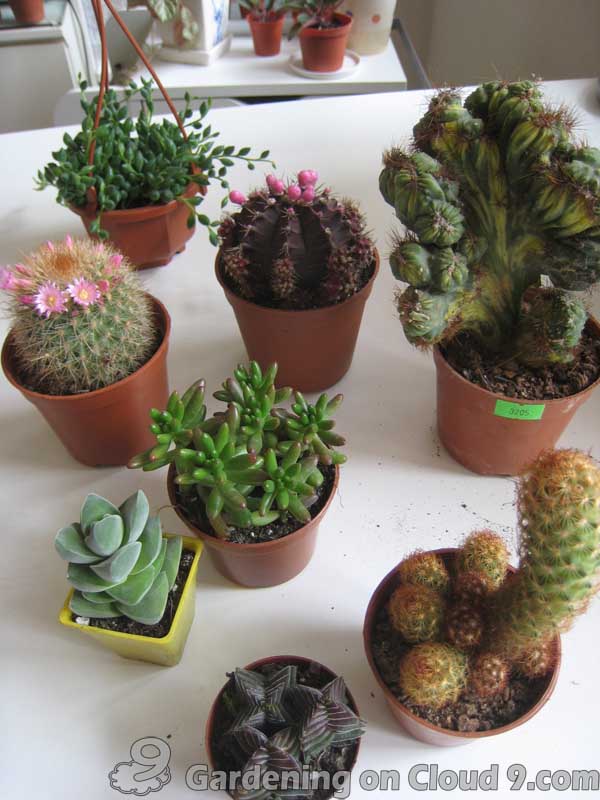
some visual reference for the cactus


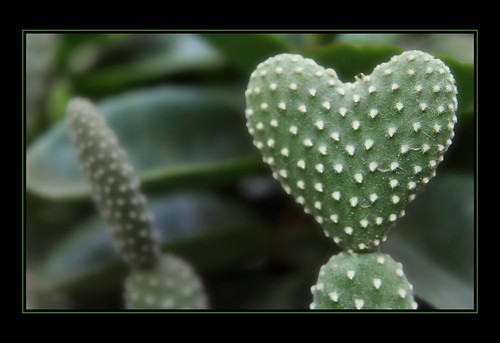

Not a cactus but somewhat related to the concept. I'll move this later.
Subscribe to:
Posts (Atom)